
Maintain PET bottle molds through controlled cleaning, inspection, cooling-circuit care, correct handling, and traceable service records. Repair a mold when qualified work can restore the required geometry, function, and bottle quality at an acceptable total cost. Replace it when damage, wear, obsolete design, or repeated downtime makes dependable recovery impractical.
What Should a Mold Maintenance Plan Cover?
Start with the mold supplier’s instructions for the actual material, surface treatment, construction, and mounting system. Define routine checks, service intervals, permitted cleaning methods, and tasks reserved for specialist repair. Adjust inspection frequency using operating history and observed condition rather than adopting an unrelated universal interval.
Assign an identifier to each mold set and relevant cavity or base component. Record the bottle design, drawing revision, compatible machine, and approved preform. This prevents parts from similar-looking sets being mixed during maintenance or changeover.
Connect maintenance records with bottle quality and production events. Repeated surface marks, cavity-specific defects, cooling changes, and longer setup time can reveal deterioration before a complete failure. A mold log becomes more useful when it describes the result of the work rather than only the date it occurred.
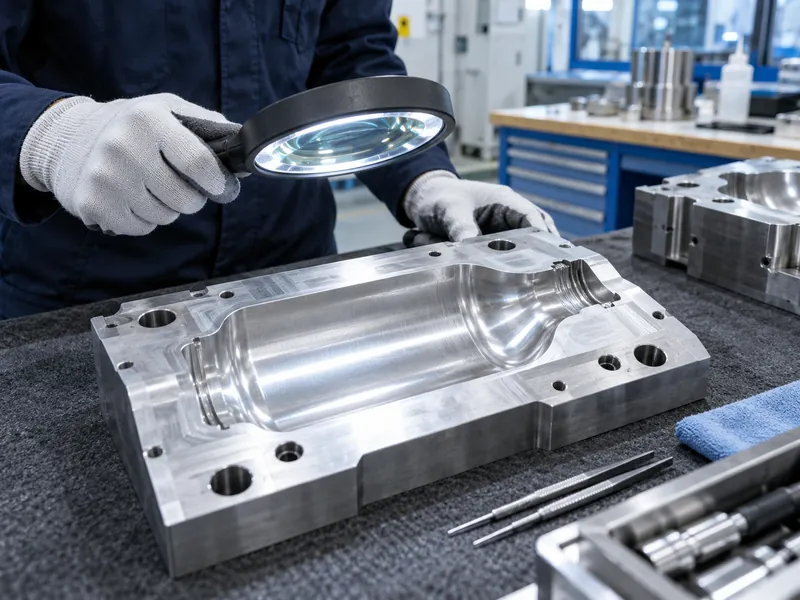
Which Checks Belong in Routine Inspection?
Inspect cavity surfaces, parting faces, locating features, mounting points, base components, vents, seals, and accessible cooling connections. Look for deposits, corrosion, impact damage, abnormal contact, and evidence of leakage. Compare findings with approved reference photographs or previous inspection records.
Check the bottles produced by each cavity for recurring marks, dimensional differences, and relevant performance changes. A surface defect that appears at the same position repeatedly can guide the tooling inspection. Do not assume every bottle defect comes from the mold; preform, heating, air, and alignment problems can produce overlapping symptoms.
| Inspection Area | Reason for Attention |
| Cavity and Parting Surfaces | Deposits, scratches, wear, and repeatable bottle marks |
| Locating and Mounting Features | Alignment, seating, and secure installation |
| Vents | Obstruction or damage affecting the approved venting function |
| Cooling Circuit | Leaks, restrictions, corrosion, and changed thermal performance |
| Base and Replaceable Parts | Wear, correct identity, and reliable movement or seating |
Document the severity and location of each finding. A measured trend is more informative than repeatedly writing that a mold looks worn. Escalate damage that may affect safe installation or pressure integrity according to the supplier’s procedure.
How Should Molds Be Cleaned?
Use the approved cleaning agent, tool, and contact method for the mold surface. Remove residues without scratching, rounding, or chemically attacking functional features. A method suitable for one coating or alloy may damage another.
Keep cleaning distinct from polishing or machining. Abrasive work can change texture, dimensions, vent edges, and parting surfaces. Obtain the tooling supplier’s direction before attempting to remove a defect by taking material away.
Protect ports and internal passages from debris during external cleaning. After cleaning, inspect the surface under suitable lighting and confirm that residues have been removed. Restore lubrication or protective treatment only where the supplier specifies it, using materials compatible with the application.
Apply the machine’s isolation, depressurization, cooling, and lifting procedures before service. Mold halves and related parts can be heavy or retain heat. Use the intended handling points and support surfaces so maintenance does not introduce new damage.
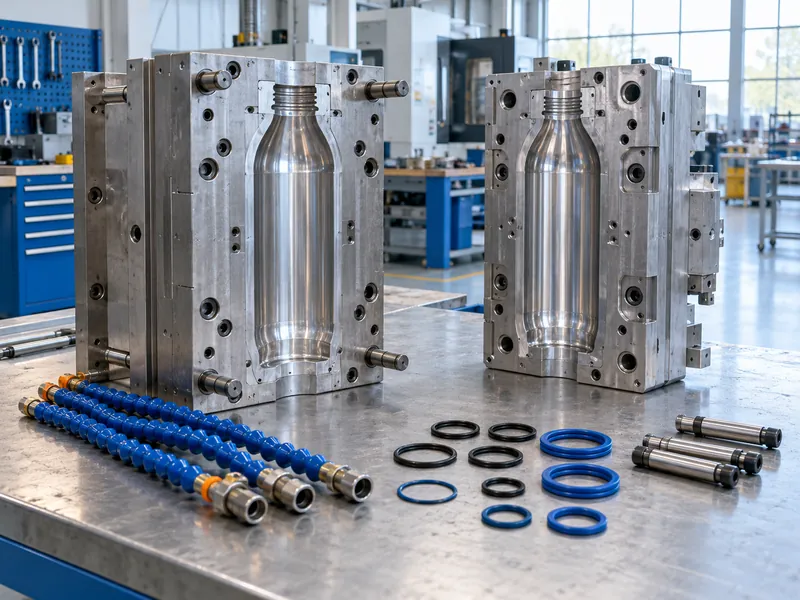
How Do Cooling Passages Affect Mold Life?
Cooling performance can deteriorate through deposits, corrosion, blocked connectors, or damaged hoses. Track supply and return conditions and branch flow under comparable production loads. A change in bottle quality may appear before the main chiller display indicates a problem.
Use the supplier-approved water quality and treatment program. If internal cleaning is required, confirm chemical compatibility, concentration, exposure time, flushing, and disposal requirements with the responsible specialists. An aggressive cleaning attempt can damage seals or tooling and leave residues in the circuit.
After service, verify flow and leak tightness using the approved procedure. Restore the correct supply and return connections and record the result. Do not regard an externally dry mold as proof that its internal passages are clear.
How Should Tooling Be Stored Between Runs?
Clean and prepare the mold for storage using the supplier’s corrosion-protection instructions. Protect cavity and mating surfaces from contact with hard objects. Use racks, trays, or supports that hold the tooling securely without loading delicate features.
Keep each set together with identified replaceable components and its current service status. Separate tooling awaiting repair from tooling released for production. A clear status label helps prevent a damaged set being installed during a rushed changeover.
Control the storage environment and inspect tooling that has been idle for an extended period before installation. Remove storage protection as required by the supplier and check connections and seals. Before an idle mold is placed on the production schedule, have the tooling team verify its current condition and record authorization for installation.
Which Mold Defects Can Be Restored Successfully?
Repair can be appropriate when the damage is localized and the supplier can restore the required function without compromising the approved geometry. Replaceable inserts, base parts, seals, or locating components may allow targeted work. The repair scope should state what will be replaced, restored, measured, and tested.
Ask for an assessment based on the actual mold rather than a photograph alone when dimensional or internal damage is suspected. Provide drawings, material information, operating history, and representative bottles. A qualified repairer needs to understand both the defect and the production duty.
Define acceptance after repair before approving the job. Include dimensional inspection, cooling checks, surface requirements, and bottle trials as relevant. A repaired tool is not ready merely because its appearance has improved.
When Does Replacement Become More Practical?
Consider replacement when structural damage, widespread wear, repeated failed repairs, or unrecoverable geometry prevents dependable production. A new bottle design or incompatible machine interface may also make continued repair uneconomic. Evaluate the remaining useful production role of the tool rather than its original purchase price.
Compare expected repair cost, transport, inspection, trial time, downtime, and the risk of recurrence with the installed cost of new tooling. Include lead time and the availability of a qualified spare set. A cheap repair can be expensive if it repeatedly interrupts a high-volume filling schedule.
Use the same forecast production volume and quality requirements for both options. The bottling line investment assessment should include tooling-related losses where they materially affect output. Keep uncertain assumptions visible rather than presenting the comparison as an exact prediction.
How Should a Repaired or New Mold Be Qualified?
Verify identity, dimensions, mounting, cooling connections, and the approved installation procedure before production. Confirm that the tool is compatible with the intended PET bottle blowing machine. Check the machine setup as well, because a tooling problem may have originated in alignment or handling conditions.
Produce samples from every cavity using the approved preform and a documented process. Evaluate dimensions, appearance, material distribution, and the application-specific package tests. Include sustained operation and a representative restart when those conditions are relevant to the previous problem.
Record the new baseline and retain approved samples. Update the tooling revision and maintenance instructions where the repair changed a replaceable component or service requirement. Do not return the set to unrestricted production until the responsible team has reviewed the results.
What Information Supports the Next Repair Decision?
Keep a concise history of inspections, cleaning, repairs, dimensional findings, cooling performance, and cavity-specific bottle results. Add the production hours or cycles where the machine provides a reliable count. This allows the team to identify repeated deterioration and plan work before an emergency stop.
Review the history when ordering spare tooling or changing the bottle range. The best maintenance strategy preserves approved bottle quality while controlling interruption and lifecycle cost. Replace or repair based on measured condition and a defined recovery plan, with the final decision supported by the mold supplier’s technical assessment.