
Excessive foam leads to product waste, unstable filling levels, carbonation loss, poor package appearance, and lower production output. The most effective solution is to control temperature, pressure, CO₂ stability, filling speed, container condition, and valve performance together.
Keep the Beverage Temperature Low and Stable
Temperature control is one of the most effective ways to reduce foam during carbonated drink filling. A colder beverage holds CO₂ better, while a warmer beverage releases CO₂ faster. Even a small temperature rise before filling can increase foaming, especially for drinks with high carbonation levels.
For many carbonated soft drinks, the filling temperature is often controlled around 0–4°C. The exact range depends on the product recipe, carbonation volume, packaging type, and filling equipment. Sparkling water and high-carbonation soda usually require stricter temperature control than low-carbonation flavored drinks.
| Beverage Type | Typical Filling Temperature | Foam Risk if Too Warm | Control Focus |
| Sparkling water | 0–3°C | High | Stable chilling and pressure balance |
| Carbonated soft drink | 1–4°C | Medium to high | Syrup mixing, CO₂ retention, valve control |
| Sparkling juice drink | 2–5°C | Medium | Pulp, sugar, and viscosity control |
| Beer or malt beverage | 0–3°C | High | Low oxygen pickup and gentle transfer |
| Low-carbonation drink | 3–6°C | Lower | Basic cooling and smooth filling |
The key is not only reaching the target temperature, but keeping it stable from the carbonator to the filler bowl. Long pipelines, poor insulation, warm product tanks, and frequent production stops can all raise the drink temperature before filling.
Use Counter-Pressure Filling
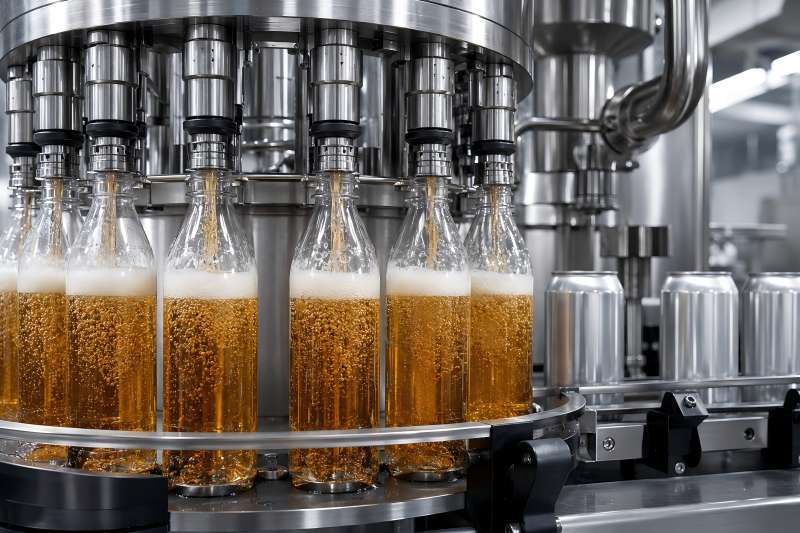
Counter-pressure filling, also called isobaric filling, is widely used for carbonated beverages because it helps maintain pressure inside the container during filling. The bottle or can is pressurized with CO₂ before the liquid enters, so the pressure difference between the product and container is reduced. This helps prevent CO₂ from escaping violently. Counter-pressure filling commonly includes container pressurization, liquid filling, controlled venting, and then capping or seaming.
Without enough counter pressure, carbonated liquid enters a low-pressure container and releases gas immediately. This causes foam, unstable fill levels, and carbonation loss. With proper counter pressure, the liquid enters more smoothly and CO₂ stays dissolved for longer.
Key Settings for Counter-Pressure Filling
| Parameter | Suggested Control Direction | Impact on Foam |
| Bottle pre-pressure | Close to product tank pressure | Reduces sudden CO₂ release |
| Filling valve opening | Smooth and gradual | Lowers turbulence |
| Venting speed | Controlled, not too fast | Prevents foam blowout |
| Filling height | Consistent across heads | Improves capping and appearance |
| CO₂ supply pressure | Stable and clean | Supports carbonation retention |
For high-speed carbonated drink filling lines, pressure fluctuation should be monitored continuously. Unstable compressed air, worn seals, blocked CO₂ channels, or poor valve synchronization can all create foam problems at specific filling heads.
Avoid Sudden Pressure Drops
Foam often appears when the drink experiences a sudden pressure drop. This can happen before filling, during filling, or just before capping. A sharp pressure change makes CO₂ leave the liquid quickly, creating bubbles and foam.
Common pressure-drop points include:
- Product transfer from carbonator to buffer tank
- Pipeline bends and restrictions
- Poorly sized valves
- Filling bowl pressure fluctuation
- Fast venting after filling
- Long waiting time before capping
A well-designed filling system should keep the product under stable pressure from carbonation to container sealing. Pressure sensors should be installed at important points, including the carbonator outlet, product tank, filling bowl, and CO₂ supply line.
Reduce Turbulence in Product Flow
Turbulence is another major cause of foam. When carbonated liquid is shaken, splashed, or forced through a narrow restriction, CO₂ escapes more easily. This is why carbonated drink filling equipment should use smooth flow paths and gentle product handling.
Good product flow design includes smooth pipe bends, sanitary valves with low resistance, proper pipe diameter, and stable pump control. High-speed transfer pumps should not create excessive shear or vibration. For some drinks, a frequency-controlled pump can help maintain steady flow instead of sudden starts and stops.
The filling nozzle also matters. Bottom-up filling or controlled wall-flow filling can reduce splashing inside the bottle. If liquid drops from too high or hits the bottle bottom with force, foam will increase quickly.
Match Carbonation Level With Filling Conditions
Different products need different carbonation levels. A beverage with 2.0 volumes of CO₂ is much easier to fill than a beverage with 3.8 volumes of CO₂. Higher carbonation creates stronger pressure inside the liquid, so the process window becomes narrower.
| CO₂ Volume Level | Example Products | Filling Difficulty | Foam Control Need |
| 1.5–2.0 vol | Light sparkling drinks | Low | Basic cooling and pressure control |
| 2.0–3.0 vol | Soft drinks, flavored sparkling water | Medium | Stable counter pressure |
| 3.0–4.0 vol | High-carbonation soda, sparkling water | High | Strict cooling, pressure, and venting control |
| Above 4.0 vol | Special highly carbonated products | Very high | Customized filling parameters |
When foam is frequent, the problem is not always the filling machine. Sometimes the carbonation level is too high for the selected bottle, closure, temperature, or filling speed. Before increasing production speed, the factory should check whether the recipe and packaging can support the target CO₂ volume.
Control Bottle and Can Conditions
Container temperature and cleanliness also affect foam. Warm bottles can raise the surface temperature of cold carbonated drinks during filling. This can trigger bubbles around the inner wall, especially in lightweight PET bottles or glass bottles stored in hot areas.
Containers should be clean, dry, and free from dust, oil, mold release residue, or cleaning chemical residue. Small particles on the inner surface can become nucleation points where bubbles start forming. For glass bottles, scratches or internal defects may also increase bubble formation.
For PET bottles, shape stability is important. Thin bottle walls can deform under pressure, causing unstable filling levels and inconsistent foam behavior. For cans, poor rinsing, moisture, or temperature difference can also affect filling smoothness.
Optimize Filling Speed
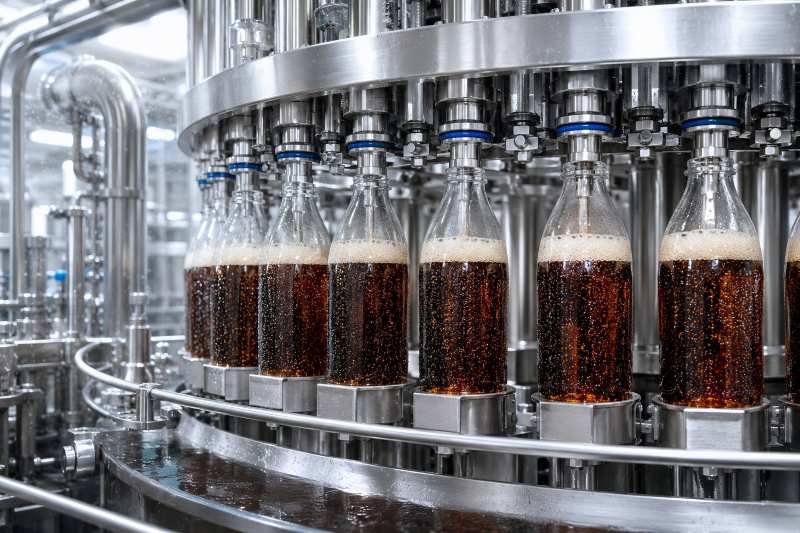
Many factories try to increase filling speed to improve output, but speed must match carbonation level, bottle size, and machine design. A filling speed that works well for still water may be too aggressive for carbonated drinks.
If foam appears mostly at high speed, the line may need slower filling valve opening, better pressure balance, or longer filling time. Reducing speed slightly may improve total efficiency because it lowers product loss, rework, cleaning time, and downtime.
Foam Reduction After Process Adjustment
| Item | Before Adjustment | After Adjustment | Improvement |
| Filling temperature | 7°C | 3°C | More stable CO₂ retention |
| Average foam overflow rate | 4.5% | 0.8% | 82% reduction |
| Average filling accuracy deviation | ±8 ml | ±2 ml | Better fill consistency |
| Product loss per 10,000 bottles | 45 L | 9 L | 36 L saved |
| Line stop frequency | 6 times/shift | 2 times/shift | Higher production stability |
The data above is a practical reference example. Actual results depend on product formula, machine structure, bottle size, carbonation level, and operating conditions.
Improve Filling Valve Maintenance
Even with correct temperature and pressure, poor valve condition can still cause foam. Filling valves are directly responsible for product flow, pressure balance, and venting. Worn seals, blocked gas channels, damaged springs, or inconsistent valve opening can make one or several filling heads foam more than others.
Operators should regularly inspect:
- Filling valve seals
- CO₂ pressurization channels
- Vent tubes
- Return gas paths
- Product flow ports
- Level control parts
- CIP cleaning results
If foam appears only at certain filling heads, the problem is likely related to valve condition, not the whole process. A head-by-head inspection can quickly identify the source.
Cap or Seal the Container Quickly
After filling, the container should be capped or sealed as quickly as possible. If the filled bottle waits too long before capping, CO₂ continues to escape, foam rises, and carbonation level drops. This is especially important for rotary carbonated drink filling machines, where filling and capping are usually integrated.
Poor cap feeding, unstable cap torque, delayed crown capping, or can seamer issues can all make foam worse. Good foam control requires smooth cooperation between the filler and capper, not only good filling performance.
For PET bottles, correct cap torque helps maintain carbonation after filling. For glass bottles, crown cap quality and sealing pressure are important. For cans, seamer setup directly affects gas retention and product stability.
Use Proper CIP and Sanitary Design
Clean-in-place performance also affects foam. Sugar, syrup, pulp, protein, flavor oil, or cleaning residue can change surface tension and create unstable foam. A beverage that looks normal in the mixing tank may foam heavily if product-contact surfaces are not fully cleaned.
Sanitary design should reduce dead corners, product buildup, and difficult-to-clean areas. CIP flow rate, temperature, cleaning time, and chemical concentration should be verified regularly. After cleaning, the system should be fully rinsed to avoid chemical residue entering the product.
For flavored carbonated drinks, cleaning is especially important because sweeteners, colors, and aroma compounds can remain in pipes or valves. These residues may not only affect foam but also create flavor carryover between batches.
Train Operators to Read Foam Signals
Foam is not just a defect. It is also a signal that something in the process is unstable. Operators should observe where and when the foam appears.
| Foam Situation | Possible Cause | Recommended Check |
| Foam at all filling heads | Product too warm or pressure too low | Check chiller, tank pressure, CO₂ supply |
| Foam at several fixed heads | Valve wear or blockage | Inspect seals, vents, and valve timing |
| Foam after filling but before capping | Slow sealing or poor transfer | Check capper synchronization |
| Foam during startup only | Unstable temperature or pressure | Improve startup procedure |
| Foam increases during long runs | Product warming or CIP residue | Check insulation and cleaning quality |
A good production team should record foam problems by time, product batch, filling head, temperature, pressure, and line speed. These records help engineers find patterns instead of relying on guesswork.
Build a Stable Foam Control Process
Reducing foam during carbonated drink filling requires a complete process approach. The factory should not only adjust one machine parameter. It should manage the entire path from water treatment, syrup mixing, carbonation, cooling, product transfer, filling, capping, and final inspection.
A practical foam control checklist includes:
- Keep beverage temperature low and stable
- Maintain proper carbonation pressure
- Use counter-pressure filling for carbonated drinks
- Avoid sudden pressure drops
- Reduce turbulence in pipes and filling valves
- Keep bottles or cans clean and suitable for filling
- Match filling speed with CO₂ volume
- Maintain filling valves regularly
- Cap or seal containers quickly
- Monitor foam data during production