
A bottle labeling machine works best when it is clean, stable, and correctly adjusted for the bottle, label, and production speed. Even a small buildup of glue, dust, label backing, or product residue can cause skewed labels, wrinkles, bubbles, missing labels, or unstable output.
Regular cleaning and adjustment also help extend machine life. For beverage, cosmetics, chemical, pharmaceutical, and daily-use product lines, a clean and well-set labeling machine reduces downtime and keeps packaging quality consistent.
Why Cleaning and Adjustment Matter
Bottle labeling is a precision process. The label roll, sensor, bottle separator, conveyor, pressing belt, guide rails, and labeling head must work together at the same rhythm.
When one part is dirty or misaligned, the whole labeling process becomes unstable. A label may start too early, attach too late, shift left or right, or fail to wrap smoothly around the bottle.
Before cleaning or adjustment, operators should follow lockout/tagout procedures where unexpected machine startup may create risk. Use lockout/tagout to control hazardous energy during machine maintenance.
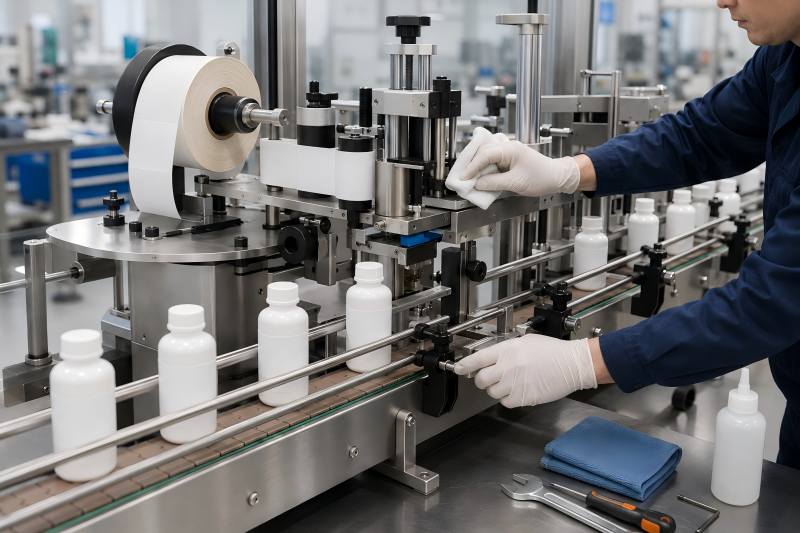
Cleaning and Adjustment Overview
| Area | Cleaning Focus | Adjustment Focus | Suggested Check Frequency |
| Conveyor belt | Dust, oil, liquid, label scraps | Speed, bottle spacing, belt tension | Daily |
| Labeling head | Adhesive residue, paper dust | Label output position, peeling plate angle | Daily / per changeover |
| Label sensor | Dust, film, label liner buildup | Sensitivity, detection distance | Daily |
| Bottle guide rails | Product residue, friction points | Width, parallel alignment | Per bottle size |
| Pressing belt / roller | Adhesive, ink transfer, dust | Pressure, height, contact angle | Daily |
| Label roll holder | Paper dust, liner debris | Roll centering, tension | Per roll change |
| Electrical cabinet | Dust, moisture | Cooling, loose wiring check | Monthly |
Step 1: Prepare the Machine Safely
Stop the machine before cleaning. Remove bottles, labels, loose scraps, and tools from the working area.
Turn off the main power when deep cleaning, adjusting moving parts, or touching the labeling head. Keep emergency stop buttons, guards, and safety switches functional because machine guarding is required to protect operators from hazards such as nip points and rotating parts.
Prepare cleaning tools before starting:
- Soft lint-free cloth
- Mild detergent or approved cleaner
- Alcohol wipes for sensors, if allowed by the machine supplier
- Small brush for paper dust
- Air blower with controlled pressure
- Hex keys and adjustment tools
- Lubricant recommended by the manufacturer
- Waste bin for used labels and backing paper
Do not spray liquid directly on sensors, motors, touch screens, or electrical components. Moisten the cloth before wiping the surface.
Step 2: Clean the Conveyor System
The conveyor carries bottles through the labeling zone. If the belt is dirty or slippery, bottles may rotate unevenly or shift during labeling.
Clean the conveyor belt with a soft cloth. Remove product spills, oil, bottle dust, broken label pieces, and liner waste.
Check the underside and side edges of the belt. Label scraps often stick near guide rails, bottle separators, and transfer points.
For round bottles, conveyor stability is especially important. If the bottle moves while the label is being applied, the label may become spiral, tilted, or wrinkled.
Useful cleaning checks include:
- Belt surface is dry and clean
- No label backing is stuck near the roller
- No bottle cap, dust, or broken plastic is trapped
- Conveyor runs smoothly without shaking
- Bottle movement stays straight through the labeling area
Step 3: Clean the Labeling Head
The labeling head controls label release. This area must stay clean because dust or adhesive buildup can affect label peeling and feeding.
Clean the label path from the label roll to the peeling plate. Pay attention to rollers, guide shafts, tension plates, and the label outlet.
The peeling plate should be smooth and free from adhesive. A dirty peeling plate may cause the label to release late or curl before touching the bottle.
Do not use sharp metal tools to scrape adhesive from rollers or plates. Scratches can increase friction and damage labels during high-speed operation.
Step 4: Clean the Label Sensor
The sensor detects the gap, mark, or edge of each label. If the sensor lens is dusty, the machine may miss labels or stop frequently.
Use a soft cloth or approved wipe to clean the sensor surface. For transparent labels, clear labels, dark bottles, or reflective packaging, sensor cleanliness becomes even more important.
After cleaning, run a short test to confirm that the sensor detects each label correctly. Adjust sensitivity only after the sensor is clean, because dirt can create false adjustment results.
Step 5: Clean the Pressing Belt and Labeling Roller
The pressing belt or roller helps attach the label firmly to the bottle surface. If this part has glue, dust, or ink transfer, it can leave marks on the label.
Wipe the contact surface carefully. Rotate the roller by hand only when the machine is powered off and safe to touch.
Check for wear, hardening, cracks, or uneven pressure marks. A damaged pressing part may cause bubbles, poor edge adhesion, or uneven label tension.
For square, oval, or special-shaped bottles, pressing pressure must be balanced. Too much pressure can deform soft bottles, while too little pressure may leave bubbles or loose label edges.
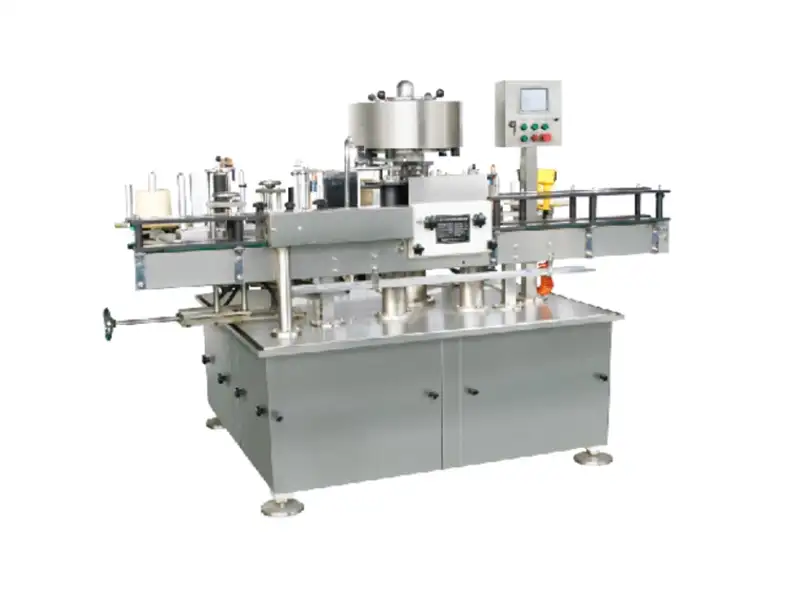
Step 6: Adjust Bottle Guide Rails
Guide rails keep bottles in the correct path. They should hold the bottle steadily without squeezing it.
Set the rail width slightly wider than the bottle body. The bottle should pass smoothly, but it should not shake from side to side.
For unstable bottles, such as tall cosmetic bottles or lightweight plastic bottles, check the rail height as well. A low rail may not control the bottle body, while a high rail may interfere with caps or shoulders.
Typical guide rail setup data:
| Bottle Type | Suggested Rail Clearance | Common Risk | Adjustment Goal |
| Round PET bottle | 1–2 mm per side | Bottle rotation shift | Smooth straight movement |
| Glass bottle | 1–1.5 mm per side | Impact or noise | Stable but not tight |
| Square bottle | 1.5–2.5 mm per side | Corner friction | No jamming at edges |
| Oval bottle | 1–2 mm per side | Label position drift | Centered bottle path |
| Small vial | 0.5–1 mm per side | Falling or shaking | Precise bottle control |
These values are practical starting points. Final settings should be confirmed by real bottle samples, label material, and production speed.
Step 7: Adjust the Bottle Separator
The bottle separator controls spacing between bottles. If spacing is too short, two bottles may enter the labeling zone together.
Adjust the separator wheel, screw, or timing device according to bottle diameter. The gap should allow one bottle to reach the labeling point at a time.
A good starting point is to keep the gap between bottles at least 1/2 of the bottle diameter for medium-speed labeling. For high-speed machines, spacing should follow the equipment manual and servo timing.
Check these points:
- Bottles do not touch each other before labeling
- Each bottle reaches the sensor at a stable interval
- The label begins consistently at the same point
- No bottle is pushed too hard by the separator
Step 8: Adjust the Label Roll and Tension
Label tension affects label feeding accuracy. If tension is too loose, the label may shift. If it is too tight, the liner may break or the label may stretch.
Center the label roll on the roll holder. The label path should stay straight from the roll to the peeling plate.
Check the liner rewind system. If the backing paper is not rewound evenly, label feeding may become unstable after several minutes of operation.
A simple test is to run the machine slowly and watch the label edge. If the label moves left and right, adjust the guide rings, roll position, or tension device.
Step 9: Adjust the Label Sensor Position
The label sensor should align with the label gap, black mark, or detection area. Poor sensor alignment often causes missed label detection.
For paper labels, the sensor usually detects the gap between labels. For transparent labels, the machine may need an ultrasonic or special clear-label sensor.
Move the sensor until it detects the label edge consistently. Then run several labels without bottles to confirm stable output.
Common sensor adjustment targets:
| Label Type | Sensor Focus | Typical Issue | Practical Adjustment |
| Paper label | Gap between labels | Double label output | Relearn label gap |
| Transparent label | Label edge or thickness | Missed detection | Use clear-label sensor mode |
| Black mark label | Printed mark | Early or late release | Align sensor with mark |
| Metallic label | Reflective surface | False signal | Reduce reflection influence |
| Small label | Narrow gap | Unstable detection | Slow speed during setup |
Step 10: Adjust Labeling Position
Labeling position includes height, front-back start point, and wrap alignment. These settings determine whether the final label looks professional.
First, adjust label height. The label should sit at the correct position on the bottle body, not too close to the shoulder or bottom curve.
Second, adjust the start position. For round bottles, the label should begin at the same point each time. Front and back labels should match the bottle’s facing direction.
Third, adjust the wrap pressure. The label should attach smoothly without bubbles, wrinkles, or edge lifting.
Use 10–20 test bottles after each major change. One or two samples are not enough because small errors may only appear during continuous running.
Step 11: Adjust Conveyor and Labeling Speed
Conveyor speed and label feeding speed must match. If the label feeds faster than the bottle moves, wrinkles may appear. If it feeds too slowly, the label may stretch or drag.
Start at low speed after cleaning or changeover. Increase speed gradually while checking label position.
Recommended setup data:
| Production Stage | Suggested Speed Range | Inspection Focus |
| First setup test | 10–20 bottles/min | Basic label position |
| Trial run | 20–40 bottles/min | Wrinkles, bubbles, skew |
| Stable production | 40–120 bottles/min | Repeat accuracy |
| High-speed line | 120+ bottles/min | Sensor timing and spacing |
Actual speed depends on bottle size, label material, machine structure, and operator experience. A stable 60 bottles per minute with accurate labeling is better than 100 bottles per minute with frequent rejects.
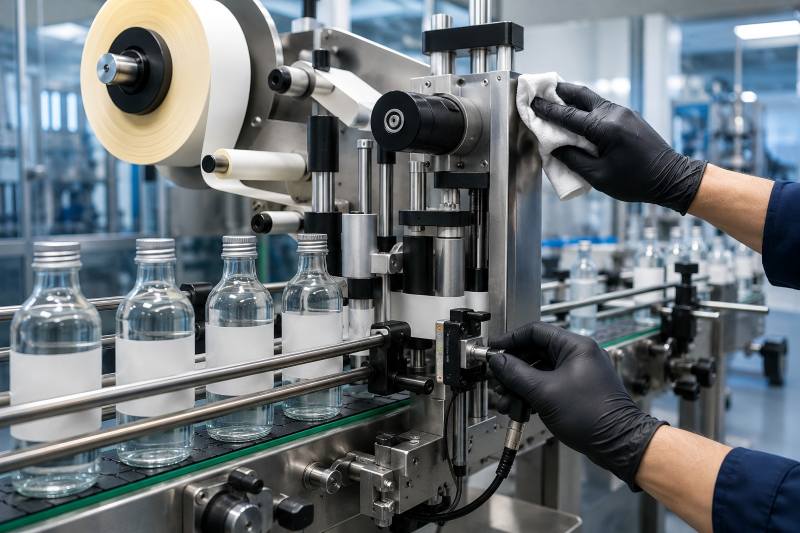
Step 12: Check Lubrication and Wear Parts
Not every part of a labeling machine needs lubrication. Over-lubrication can attract dust and contaminate labels.
Lubricate only the points recommended by the equipment supplier. Avoid applying oil near label rolls, sensors, belts, or product-contact areas.
Check wear parts regularly, including:
- Conveyor belt
- Pressing belt
- Rollers
- Bearings
- Guide rail pads
- Label peeling plate
- Sensor bracket
- Rewind shaft
- Separator wheel
Replace damaged parts early. A worn roller or loose guide rail can create repeated defects that cleaning alone cannot solve.
Common Problems After Cleaning or Adjustment
If defects appear after cleaning, review the last changed area first. Most problems come from sensor position, label tension, guide rail width, or conveyor speed mismatch.
| Problem | Likely Cause | Quick Fix |
| Label is tilted | Bottle shaking or guide rail misalignment | Adjust rails and bottle path |
| Label has wrinkles | Speed mismatch or high pressure | Match speeds and reduce pressure |
| Label is too high or low | Labeling head height is wrong | Adjust head height |
| Label starts too early | Sensor position or delay setting issue | Relearn sensor and timing |
| Label does not stick well | Dirty bottle or weak pressure | Clean bottle surface and adjust roller |
| Machine misses labels | Dirty sensor or wrong sensitivity | Clean and reset sensor |
| Backing paper breaks | Excessive tension | Reduce rewind or feed tension |
| Bottles jam | Guide rails too tight | Increase rail clearance |
Daily Cleaning Checklist
A daily checklist helps operators build stable habits. It also makes shift handover easier.
Before production:
- Confirm the machine is clean and dry
- Check label roll direction
- Check bottle guide rail width
- Confirm sensor detection
- Run 5–10 test bottles
- Inspect label height and start point
During production:
- Remove label scraps immediately
- Watch for label drift
- Keep the conveyor clean
- Check bottle spacing
- Record repeated defects
After production:
- Remove remaining bottles and labels
- Wipe the conveyor and labeling head
- Clean the sensor surface
- Empty label waste
- Turn off power according to plant procedure
Best Practices for Changeover
Changeover means switching from one bottle, label, or product to another. This is when most adjustment mistakes happen.
Keep a setup record for each product. The record should include bottle size, guide rail width, label height, sensor position, speed, and pressure setting.
For repeat orders, this data saves time and reduces trial-and-error. It is especially useful for factories that label multiple bottle shapes on one machine.
Useful changeover records include:
- Bottle diameter or width
- Bottle height
- Label size
- Label roll direction
- Labeling height
- Conveyor speed
- Sensor mode
- Pressing pressure
- Separator setting
- Test result and defect rate
Cleaning and adjusting a bottle labeling machine is not only a maintenance task. It directly affects label accuracy, product appearance, production speed, and packaging cost.
A good process starts with safety, then moves through cleaning, sensor checking, guide rail adjustment, label tension control, and test production. When operators follow a clear routine, the machine runs more smoothly and label defects become easier to control.