
Filling accuracy, high-level alarms, and low-level alarms should not be treated as three completely separate problems. They often result from the same underlying instability in the filling system.
When all filling heads move in the same direction, investigate common conditions such as product supply, tank level, pressure, temperature, and machine settings. When only one head behaves abnormally, focus on that filling circuit.
Most importantly, stabilize the process before recalibrating the machine.
A filling machine that repeatedly needs parameter correction may not have a calibration problem at all. The real cause may be changing inlet pressure, unstable tank level, air in the product, valve response, or insufficient upstream supply. Finding that root cause produces a much more reliable solution than simply adjusting the fill volume until the next fault appears.
First Identify What Type of Filling Error You Have
Before changing any machine settings, observe how the error appears.
Different patterns usually point toward different causes.
| Fault Pattern | Likely Direction |
| All containers are consistently underfilled | Fill parameter, insufficient supply, low pressure, short filling time |
| All containers are consistently overfilled | Incorrect parameter, valve closing delay, calibration error |
| Fill volume gradually changes during production | Tank level, pressure, temperature, viscosity |
| Only one filling head is inaccurate | Individual valve, nozzle, seal, cylinder, flowmeter or calibration |
| Random containers show different volumes | Air bubbles, unstable supply, valve response, container positioning |
| Accuracy becomes worse at higher speed | Insufficient product supply or filling time |
| Error appears after product changeover | Viscosity, foaming, temperature or parameter mismatch |
This distinction is important.
If every filling head suddenly produces approximately 10 mL less than the target, it is unlikely that all filling valves developed the same mechanical problem at exactly the same time. A common upstream factor should be checked first.
If only filling head No. 4 is inaccurate while the others remain stable, the investigation should move toward that individual filling circuit.
Filling Accuracy Is Not Just a Machine Setting
A filling system is designed to deliver a controlled quantity of product under certain operating conditions. When those conditions change, filling accuracy can change with them.
Depending on the machine design, the actual fill quantity may be influenced by:
- Product tank level
- Product supply pressure
- Filling pressure
- Filling time
- Valve opening and closing response
- Product viscosity
- Product temperature
- Air inside the product
- Foaming characteristics
- Nozzle condition
- Flowmeter or weighing-system calibration
- Piston or cylinder sealing condition
- Container dimensions and positioning
The first troubleshooting principle is therefore simple:
Do not compensate for an unstable process by continuously changing the filling parameter.
For example, increasing filling time may temporarily correct an underfill caused by low supply pressure. But once the pressure returns to normal, the same machine may begin overfilling.
Fix the unstable condition first, then recalibrate the filler.
Troubleshooting Consistent Underfilling
When most or all containers are below the target volume, start with the product supply side.
1. Check the Product Level
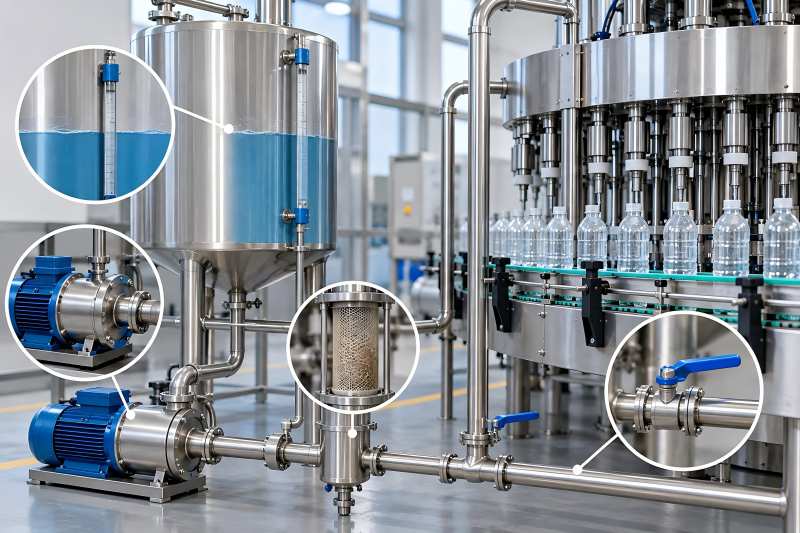
Look at the liquid level inside the filling tank, hopper, or balance tank.
If the level is significantly below its normal operating range, the pressure available at the filling valve may decrease, particularly in gravity and certain pressure-assisted filling systems.
The machine may still complete every filling cycle normally, but less product reaches the bottle during the available filling time.
Do not immediately increase the filling time. First determine why the tank level is low.
2. Check Product Supply Capacity
Compare the upstream supply rate with the filler’s actual consumption.
A common problem appears after increasing production speed. The filling machine may be capable of running faster, but the transfer pump, supply pipe, filter, or upstream preparation system may not be able to supply product at the same rate.
A simplified relationship is:
Required product supply ≈ bottle volume × bottles per hour
A 500 mL line running at 6,000 bottles per hour theoretically consumes about:
0.5 L × 6,000 = 3,000 L/h
The real supply system should normally have additional capacity rather than being designed exactly at this theoretical consumption.
3. Check for Product Line Blockages
Low flow may result from factors other than insufficient pump capacity. Check for:
- Partially closed valves
- Blocked filters
- Product buildup inside pipes
- Kinked flexible hoses
- Incorrect valve positions after cleaning
- Excessive pressure loss through long pipelines
- Restricted fittings
If the machine operated normally before and suddenly begins underfilling, a new restriction is often more likely than an undersized pump.
Troubleshooting Consistent Overfilling
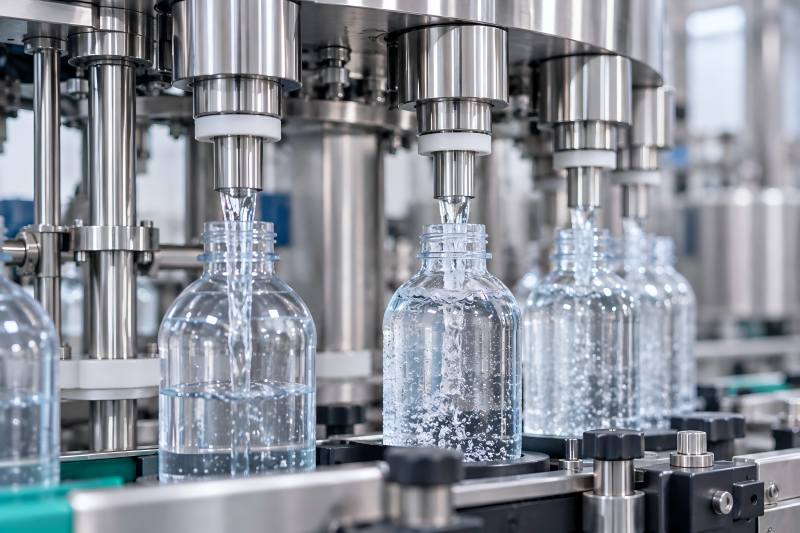
Consistent overfilling is generally easier to diagnose because the error tends to be systematic.
First confirm the filling parameter and recipe. Incorrect settings after a product or bottle changeover are common.
Then inspect whether the filling valve closes at the expected moment.
A valve that closes slowly can continue delivering product after the control signal has ended. This may result from contamination, seal deterioration, actuator problems, insufficient pneumatic pressure, or mechanical sticking.
For piston filling systems, verify the effective piston stroke. For flowmeter fillers, verify the pulse or volume calibration. For weighing fillers, check zero and load-cell calibration.
A useful diagnostic test is to reduce the filling speed temporarily.
If the overfill remains almost identical, calibration is a strong suspect. If the error changes significantly with machine speed, valve dynamics or flow behavior deserves more attention.
When Different Filling Heads Give Different Volumes
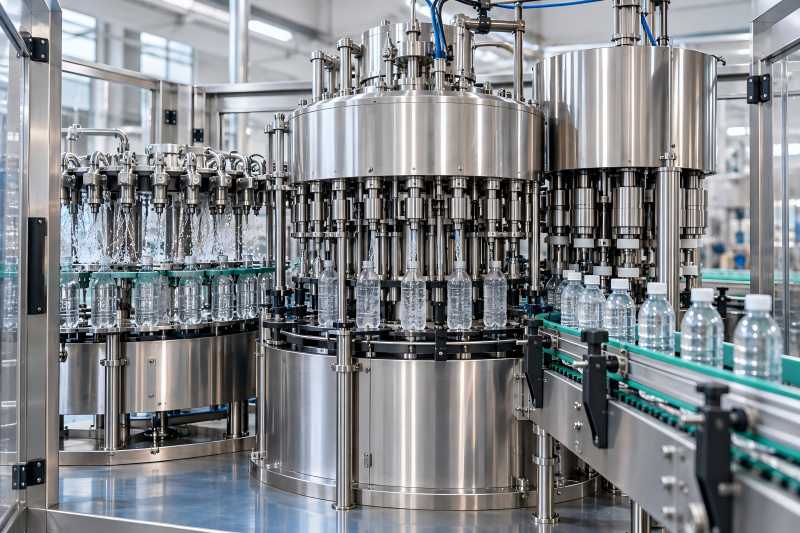
Multi-head filling machines provide a useful troubleshooting advantage: the other filling heads become your reference.
Suppose an eight-head filler produces the following results:
| Filling Head | Target | Actual |
| 1 | 500 mL | 499 mL |
| 2 | 500 mL | 501 mL |
| 3 | 500 mL | 500 mL |
| 4 | 500 mL | 482 mL |
| 5 | 500 mL | 500 mL |
| 6 | 500 mL | 499 mL |
| 7 | 500 mL | 501 mL |
| 8 | 500 mL | 500 mL |
In this case, changing the global filling parameter would be the wrong response.
Head No. 4 should be investigated independently.
Possible causes include a partially blocked nozzle, leaking seal, restricted product path, trapped air, incorrect individual calibration, abnormal valve opening, or piston seal wear.
A practical method is to swap components between a normal head and the abnormal head where the machine design permits it.
If the problem follows the component, the component is likely responsible. If the problem remains at the same station, investigate the actuator, control signal, product path, or station-specific calibration.
Why Filling Volume Gradually Drifts
A machine may start the shift at 500 mL and gradually move toward 490 mL or 510 mL.
This differs from a consistent calibration deviation. Gradual drift usually indicates that an operating condition is changing.
1. Product Temperature
Temperature can change viscosity considerably for some liquids.
Oils, sauces, creams, detergents, cosmetics, syrups, and other viscous products may flow differently after the production system warms up.
A filler calibrated with cold product during startup may therefore behave differently after 30–60 minutes of continuous production.
2. Tank Level
Watch whether filling-volume changes follow the level inside the product tank.
If fill quantity decreases whenever the tank approaches the low-level limit and increases after replenishment, the level-control system should be investigated before recalibrating the filler.
3. Air in the Product
Air bubbles create particularly confusing filling errors.
They can affect volumetric measurement and cause inconsistent flow. Foamy products can also appear visually full even when the actual product mass or liquid volume is low.
Check the pump inlet, pipe connections, recirculation design, agitation speed, and product-return configuration for possible air entrainment.
High Liquid Level Fault Troubleshooting
A high-level alarm means that product is entering the filling tank faster than it is leaving, or that the control system incorrectly believes the level is high.
The first distinction should therefore be:
Is the tank actually overfilled, or is the level signal incorrect?
If the tank is physically too full, investigate the inlet-control system.
Possible causes include:
- Inlet valve fails to close
- Supply pump continues running
- Level sensor does not send the stop signal
- PLC output remains active
- Pneumatic valve is mechanically stuck
- Product inflow exceeds the control system’s response capability
If the physical liquid level is normal but the HMI shows a high-level alarm, focus on the sensor and electrical signal instead.
Inspect the sensor for product buildup, contamination, loose wiring, incorrect installation, sensitivity settings, or damage.
Products that coat surfaces—such as sauces, oils, creams and concentrated liquids—can create false level detection depending on the sensor technology.
High and Low Level Alarms Appearing Repeatedly
Another common symptom is continuous cycling between high- and low-level conditions.
The machine receives product, reaches the high limit, stops feeding, quickly drops toward the low limit, and starts feeding again.
Some cycling is normal, but excessive fluctuation can make filling conditions unstable.
Possible reasons include an excessively large inlet flow, insufficient control range between level limits, poor sensor positioning, unsuitable PID settings in continuously controlled systems, or an oversized supply pump.
The liquid level does not need to remain perfectly constant during operation. The practical goal is to keep the level within a stable operating window that does not significantly affect filling performance.
Check Filling Accuracy by Weight, Not Visual Liquid Level
Operators sometimes judge accuracy by comparing liquid heights inside bottles.
This can be misleading.
PET and glass bottles have manufacturing tolerances. Small differences in internal dimensions can produce visibly different liquid levels even when both bottles contain the same amount of product.
For troubleshooting, weighing is often more reliable.
For products with known density:
Product mass = Filled bottle weight − Empty bottle weight
The corresponding volume can then be estimated from product density.
For example, if a product density is 1.02 kg/L and the net product weight is 510 g:
Volume ≈ 510 ÷ 1.02 = 500 mL
When accuracy matters, use a representative sample rather than measuring a single bottle.
A Better Troubleshooting Sequence
Randomly changing machine parameters can make the original fault harder to identify.
A more systematic sequence is:
| Step | What to Check | Purpose |
| 1 | Confirm actual fill weight/volume | Verify that a real accuracy problem exists |
| 2 | Compare all filling heads | Separate common faults from individual-head faults |
| 3 | Check tank liquid level | Identify supply instability |
| 4 | Check pressure and product supply | Confirm stable feeding conditions |
| 5 | Inspect valves, nozzles and product paths | Find restrictions or leakage |
| 6 | Check air pressure and actuators | Verify valve response |
| 7 | Check sensors and electrical signals | Diagnose false level alarms |
| 8 | Review recipe and filling parameters | Eliminate setting errors |
| 9 | Check calibration | Correct measurement deviation |
| 10 | Run repeated samples | Confirm the fault has actually been solved |
The order matters.
Mechanical adjustment and recalibration should generally come after basic process conditions have been confirmed stable.
Use Production Data to Find Intermittent Problems
Intermittent filling faults are difficult to diagnose from a single machine stop.
Recording a small amount of production data can reveal patterns much faster.
Useful parameters include:
- Time
- Machine speed
- Tank level
- Supply pressure
- Product temperature
- Filling-head number
- Target fill
- Actual fill weight
- Alarm history
For example, if underfilling consistently appears when tank level falls below a certain point, the relationship becomes clear.
If errors concentrate on one filling head regardless of tank level and speed, the investigation can focus on that station.
Troubleshooting becomes much easier when the question changes from “Why is the machine inaccurate?” to “Under exactly what conditions does the error appear?”