
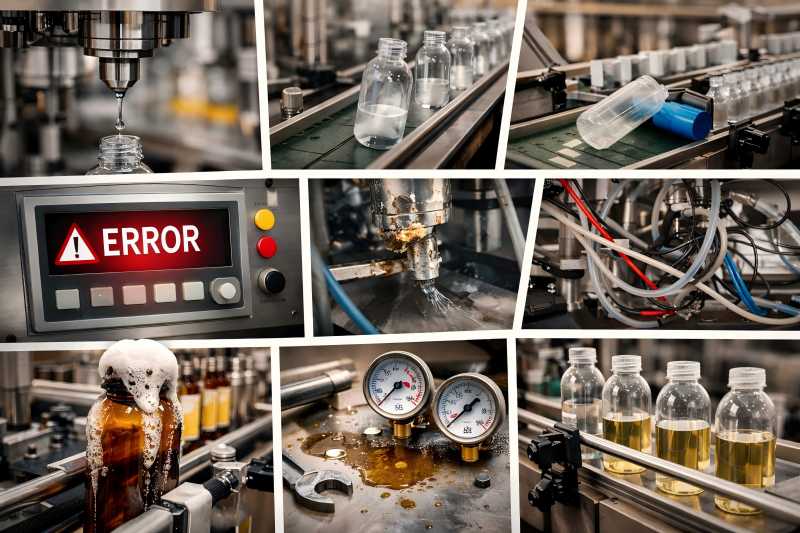
A reliable filling system helps manufacturers maintain output, improve product consistency, reduce waste, and protect product quality. However, even a well-designed machine can develop operational problems over time. When these issues are not identified and solved quickly, they can lead to downtime, higher reject rates, inaccurate fills, leakage, product contamination, and rising maintenance costs.
Why Filling Machine Problems Happen
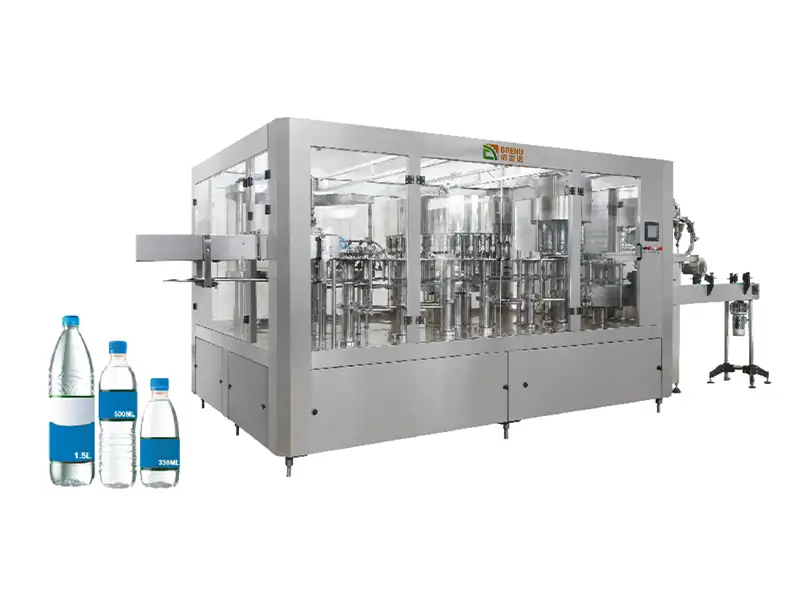
A filling machine works as part of a complete production system. It depends on correct bottle positioning, stable product supply, proper pressure, clean nozzles, accurate controls, and synchronized downstream equipment. When one part of the process becomes unstable, filling performance usually suffers.
Common reasons behind filling machine problems include:
- Inconsistent product viscosity or temperature
- Incorrect parameter settings
- Worn seals, valves, or nozzles
- Air pressure fluctuation
- Poor bottle handling and alignment
- Inadequate cleaning and sanitation
- Sensor malfunction
- Electrical or PLC control faults
- Weak preventive maintenance routines
- Line speed mismatch with capping, labeling, or conveying equipment
Before examining each problem in detail, let us first review a quick summary table.
Quick Overview of Common Filling Machine Problems
| No. | Problem | Main Impact | Common Cause |
| 1 | Inaccurate fill volume | Underfill or overfill | Wrong settings, worn valves, unstable product flow |
| 2 | Nozzle dripping | Messy containers and product loss | Damaged seals, residual product, poor cutoff |
| 3 | Foaming during filling | Overflow and inconsistent filling | Wrong filling speed, nozzle position, product behavior |
| 4 | Bottle misalignment | Missed fills and spillage | Guide rail issues, conveyor instability, sensor errors |
| 5 | Slow production speed | Lower output | Mechanical wear, line bottlenecks, poor synchronization |
| 6 | Product leakage | Waste and hygiene issues | Loose fittings, cracked hoses, seal damage |
| 7 | Air bubbles in product | Inaccurate fill and poor appearance | Suction problems, improper priming, unstable product feed |
| 8 | Sensor or control failure | Machine stops or misfills | Dirty sensors, loose wiring, software issues |
| 9 | Contamination problems | Product quality and safety risk | Inadequate cleaning, dead corners, poor sanitation |
| 10 | Frequent downtime | Reduced productivity | Reactive maintenance, repeated faults, weak inspection routines |
Inaccurate Fill Volume
Inaccurate fill volume is one of the most common and serious filling machine problems. It can appear as underfilling, overfilling, or inconsistent fill levels between containers. This issue directly affects product quality, regulatory compliance, customer satisfaction, and material cost.
Common Causes
Several factors can cause fill inaccuracy. The machine may be set incorrectly, especially after a product changeover. Worn pistons, valves, seals, or cylinders can also affect filling precision. In some cases, product viscosity changes due to temperature variation, making flow behavior different from the original machine settings. Air in the line, unstable tank pressure, or inconsistent pump supply can also create volume variations.
Troubleshooting Tips
Start by checking the machine’s fill parameters, such as fill time, piston stroke, or flow control settings. Confirm that the product temperature and viscosity are within the expected range. Inspect valves, seals, and measuring components for wear. Calibrate the machine if needed, and verify that product supply pressure is stable. If the machine uses sensors or flowmeters, clean and test them regularly.
Prevention
Use standard setup procedures for each product. Record proven settings and verify them during every changeover. Schedule routine calibration and replace worn parts before accuracy declines.
Nozzle Dripping After Filling
Dripping nozzles create a messy production area, waste product, and increase the risk of contamination. They also cause container surfaces to become sticky or dirty, which affects labeling and packaging quality.
Common Causes
Nozzle dripping often results from worn sealing components, poor valve closure, or product residue remaining at the nozzle tip. Thin liquids may continue to flow after the filling cycle if the machine cutoff timing is not optimized. For viscous products, stringing may occur if the nozzle design is not suitable.
Troubleshooting Tips
Inspect nozzle seals, shutoff valves, and cutoff timing. Clean the nozzles thoroughly to remove sticky or dried product buildup. If necessary, adjust the suck-back or anti-drip function. Review whether the nozzle design matches the product type. Some products need specialized nozzles for clean cutoff.
Prevention
Establish a nozzle cleaning routine and monitor wear on sealing parts. For difficult products, perform regular trials to optimize anti-drip settings.
Foaming During Filling
Foaming is especially common with beverages, detergents, personal care liquids, and some chemical products. Excessive foam can lead to inaccurate fills, overflow, product waste, and unattractive packaging.
Common Causes
High filling speed is one major cause. Product falling from too high a nozzle position can trap air and create turbulence. Foaming can also happen when product temperature changes or when the filling method does not suit the liquid characteristics.
Troubleshooting Tips
Reduce filling speed and check whether a two-stage filling approach is possible. Lower the nozzle closer to the container bottom or use bottom-up filling if supported by the machine. Evaluate whether the product temperature is causing greater foam formation. If needed, change the filling method or nozzle type to reduce agitation.
Prevention
Test filling behavior before production starts, especially for new products. Use product-specific filling settings instead of relying on one standard speed for all liquids.
Troubleshooting by Product Behavior
| Product Behavior | Likely Issue | Recommended Adjustment |
| Thin liquid splashing | Overflow or messy filling | Reduce speed, lower nozzle position |
| Foamy liquid | Excess foam and inaccurate fill | Use slower or staged filling |
| High-viscosity product | Incomplete or inconsistent fill | Increase pressure or adjust piston settings |
| Stringy product | Nozzle dripping or tailing | Use anti-drip nozzle or suck-back control |
| Temperature-sensitive liquid | Changing fill volume | Stabilize product temperature before filling |
Bottle Misalignment or Poor Container Positioning
When bottles or containers do not align correctly under the filling nozzles, the result can be missed fills, spillage, broken containers, and unstable line performance. This problem is common on high-speed lines where small positioning errors become significant.
Common Causes
Misalignment may come from incorrect guide rail adjustment, worn conveyor components, unstable bottle handling, inconsistent container dimensions, or faulty sensors. In some cases, bottles enter the filler too closely spaced or arrive in an unstable condition from the unscrambler or conveyor.
Troubleshooting Tips
Inspect guide rails, timing screws, star wheels, and container stops. Confirm that the bottle dimensions match the machine setup. Clean and test the positioning sensors. Watch the container movement at slow speed to see exactly where the alignment error begins. Sometimes the problem starts upstream, not at the filler itself.
Prevention
Use proper format parts for each bottle type and verify alignment during every changeover. Check conveyor wear and maintain stable infeed control.
Slow Production Speed
A filling machine may be running, but still not delivering expected output. Slow performance reduces productivity and may affect delivery schedules and operating cost.
Common Causes
The filler itself may have worn parts, poor lubrication, or unstable controls. However, slow speed is often caused by line imbalance. If bottle supply is inconsistent, product feed is insufficient, or downstream capping and labeling cannot keep pace, the filler must slow down or stop repeatedly.
Troubleshooting Tips
Start by measuring actual output against the machine’s designed speed. Identify whether the bottleneck is inside the filling machine or elsewhere on the line. Check motor condition, air supply, lubrication, and moving parts. Review machine alarms and short stops. Optimize synchronization between the filler, capper, conveyor, and packaging sections.
Prevention
Monitor line efficiency as a system, not just machine speed. Short but repeated stops often cause more output loss than a single major breakdown.
Product Leakage from Hoses, Fittings, or Seals
Leakage is both a maintenance and hygiene problem. Even a small leak can cause product loss, slippery floors, sticky equipment, contamination risks, and cleaning delays.
Common Causes
Common reasons include cracked hoses, loose clamps, worn gaskets, damaged O-rings, poor assembly after cleaning, and excessive pressure in the system. Chemical products or high-temperature liquids may also shorten seal life.
Troubleshooting Tips
Inspect all hoses, joints, manifolds, valves, and seals. Tighten loose fittings and replace damaged components immediately. Ensure seal material matches the product being filled. If pressure is too high, review system settings and install pressure control where needed.
Prevention
Use a routine leak inspection checklist. Train operators to report small leaks early before they become major failures.
Air Bubbles in the Filled Product
Air bubbles inside containers can affect appearance, volume accuracy, and product stability. This is especially important in transparent packaging or products with strict visual standards.
Common Causes
Air may enter the system through suction problems, poorly primed pumps, loose connections, inconsistent product supply, or excessive agitation in the tank. Some products naturally trap air if mixed too aggressively before filling.
Troubleshooting Tips
Check the suction line, pump seals, and hose connections for air entry points. Re-prime the system and confirm stable product feed. Reduce unnecessary mixing or turbulence in the holding tank. Adjust filling speed if it is creating excessive agitation.
Prevention
Keep the product feed system stable and free from air leaks. Review tank design and agitation method for products prone to aeration.
Sensor or Control System Failure
Modern filling machines rely on sensors, PLCs, HMIs, solenoid valves, and control logic. When these systems fail, the machine may stop unexpectedly, miss bottles, misfill containers, or give repeated alarms.
Common Causes
Dirty photoelectric sensors, loose wiring, poor electrical connections, moisture exposure, parameter errors, software faults, or power instability can all create control issues. In some cases, the real cause is simple, such as a sensor lens covered with dust or product splash.
Troubleshooting Tips
Begin with the basics. Clean sensors, check cable connections, and confirm power stability. Review alarm history and I/O status in the HMI or PLC interface. Inspect damaged cables and connectors. If settings were changed recently, compare them with the machine’s standard parameters. For persistent faults, work with the machine supplier or qualified control technician.
Prevention
Protect electrical components from moisture and contamination. Keep a backup of machine parameters and PLC programs when possible.
Control and Electrical Troubleshooting Checklist
| Symptom | Possible Cause | First Check |
| Bottle not detected | Dirty or misaligned sensor | Clean sensor and confirm position |
| Random machine stop | Loose cable or unstable power | Check terminals and power supply |
| Wrong fill timing | PLC parameter error | Compare with saved settings |
| Solenoid not responding | Coil damage or wiring fault | Test output signal and wiring |
| Repeated alarm without clear cause | Sensor interference or software issue | Review alarm history and I/O status |
Product Contamination or Poor Hygiene Performance
Contamination is one of the most serious filling machine problems, particularly in food, beverage, dairy, cosmetics, and pharmaceutical production. It can result in product rejection, customer complaints, safety issues, or even recalls.
Common Causes
Poor cleaning procedures, incomplete CIP cycles, dead corners in pipework, dirty nozzles, biofilm buildup, cross-contamination between products, and poor operator hygiene are common causes. Machines that are not cleaned correctly after product changeover are especially vulnerable.
Troubleshooting Tips
Inspect filling paths, nozzles, tanks, valves, and hoses for residue. Confirm CIP or manual cleaning works effectively. Review whether cleaning time, temperature, chemical concentration, and rinse quality are adequate. Simplify difficult-to-clean areas where possible and replace worn components that trap residue.
Prevention
Develop strict sanitation procedures and validate cleaning effectiveness. Use hygienic design principles and train operators thoroughly.
Frequent Downtime and Repeated Faults
Frequent downtime is often not one single problem but the result of many small issues happening repeatedly. It reduces overall equipment effectiveness, increases labor pressure, and makes planning difficult.
Common Causes
The main causes usually include weak preventive maintenance, delayed replacement of worn parts, poor troubleshooting records, inconsistent operator practices, and unresolved root causes. Repeated minor alarms, format change errors, and mechanical wear often build into chronic downtime.
Troubleshooting Tips
Track downtime by category and identify the most frequent causes. Use maintenance records to find repeating failures. Instead of only fixing the immediate symptom, perform root cause analysis. Review whether certain parts fail earlier than expected and whether operator setup is consistent. Standardize inspection routines and create fault-response guides.
Prevention
Move from reactive maintenance to preventive and predictive maintenance. Collect machine data, record downtime reasons, and use those records to improve long-term reliability.
Preventive Maintenance Priorities for Filling Machines
| Area | Inspection Focus | Recommended Action |
| Nozzles and valves | Dripping, clogging, wear | Clean daily, replace worn seals |
| Hoses and fittings | Leaks, cracks, loose joints | Inspect regularly and tighten or replace |
| Sensors | Dust, splash, misalignment | Clean and test during routine checks |
| Conveyor and guides | Bottle stability and wear | Adjust and lubricate as needed |
| Pneumatic system | Pressure stability and leaks | Check filters, regulators, and hoses |
| Electrical system | Loose terminals, moisture, damage | Inspect connections and protect enclosures |
| Calibration points | Fill accuracy | Verify on schedule and after changeovers |
Best Practices for Faster Troubleshooting
When a filling machine problem occurs, random adjustments often make the situation worse. A systematic troubleshooting method delivers better results.
Step 1: Observe the Symptom Clearly
Do not start changing settings immediately. First identify the exact problem. Is it a dripping nozzle, underfill, bottle miss, or random stop? Watch the machine closely and define the fault clearly.
Step 2: Check What Changed
Many filling issues begin after a product change, bottle change, speed adjustment, maintenance intervention, or cleaning cycle. If something changed recently, start there.
Step 3: Separate Mechanical, Product, and Control Causes
A filling problem usually belongs to one of three categories:
- Mechanical issue
- Product-related issue
- Electrical or control issue
This makes troubleshooting faster and more logical.
Step 4: Verify Basic Conditions
Before investigating complex causes, check the basics:
- Is product supply stable?
- Is air pressure normal?
- Are sensors clean?
- Are containers positioned correctly?
- Are machine settings correct?
Step 5: Record the Solution
Every solved problem should become part of a standard troubleshooting guide. This helps operators respond faster next time and reduces repeated downtime.
How Preventive Maintenance Reduces Filling Problems
The best way to solve filling machine problems is to prevent them before they interrupt production. A strong maintenance plan reduces emergency repairs, improves filling accuracy, and extends equipment life.
A good preventive maintenance program should include:
- Daily cleaning and visual inspection
- Weekly checks on seals, hoses, and nozzles
- Routine calibration of fill accuracy
- Sensor cleaning and function testing
- Lubrication of moving components
- Scheduled replacement of wear parts
- Downtime analysis and fault tracking
- Operator training during setup and changeover
Factories that rely only on reactive repair usually experience more waste, more line stops, and more unstable quality.
Filling machines play a critical role in packaging operations, but they can only perform well when mechanical parts, controls, product conditions, and maintenance practices are all working together. The most common issues include inaccurate fill volume, nozzle dripping, foaming, bottle misalignment, slow speed, leakage, air bubbles, sensor failures, contamination, and repeated downtime. Each of these problems has practical solutions, but effective troubleshooting depends on careful observation, systematic diagnosis, and routine preventive maintenance.